


How to Generate QR Code With Simple QRCode in Laravel
Generate QRCode Laravel - QR codes are sometimes needed for product identity, inventory and others. Then, how to generate a QRcode? it's easy, we can use Simple QRcode to create QRcode in laravel framework.
In this article, we will both learn how to create or generate a QRcode so that when we scan the code it can be directed to SMS, email, website or just to find out what data is behind the QR code.
In this tutorial we will start from scratch by starting with creating a new laravel project. Following are the steps:
1. Create a laravel project by going to the directory where you want to create the laravel project. Just like the instructions from laravel, we can create a new project with the command as below.
composer create-project --prefer-dist laravel/laravel qrcode2. If the laravel project has been successfully created, then go to the project directory and run the command from the Simple QRcode as below.
composer require simplesoftwareio/simple-qrcode "~4"3. Create a new controller file with the command as below.
php artisan make:controller DataController4. Then create a model as well as a migrate file to create a data container table that will be generated into a QRcode. The command to create the model/migrate can be seen as below.
php artisan make:model Data -m5. Open the Data Migrate file in the database > migrations folder and edit it so that it looks like the one below.
<?php
use Illuminate\Database\Migrations\Migration;
use Illuminate\Database\Schema\Blueprint;
use Illuminate\Support\Facades\Schema;
class CreateDataTable extends Migration
{
    /**
     * Run the migrations.
     *
     * @return void
     */
    public function up()
    {
        Schema::create('data', function (Blueprint $table) {
            $table->id();
            $table->string('name');
            $table->string('email');
            $table->bigInteger('phone');
            $table->timestamps();
        });
    }
    /**
     * Reverse the migrations.
     *
     * @return void
     */
    public function down()
    {
        Schema::dropIfExists('data');
    }
}
6. Create a new database in phpmyadmin, adminer, laragon or others.
7. Match DB_DATABASE in the .env file with the name of the newly created database.
8. If a new database has been created, go back to the terminal and run the command
php artisan migrate.
9. Open the DataController file that was created in step 3 earlier, then edit the code to be as below.
<?php
namespace App\Http\Controllers;
use Illuminate\Http\Request;
use SimpleSoftwareIO\QrCode\Facades\QrCode;
use App\Models\Data;
class GenerateController extends Controller
{
    public function index(){
        $data = Data::all();
        return view ('welcome', ['data' => $data]);
    }
    public function store(Request $request){
        $data = new Data;
        $data->name = $request->name;
        $data->email = $request->email;
        $data->phone = $request->phone;
        $data->save();
        return back();
    }
    public function generate ($id)
    {
        $data = Data::findOrFail($id);
        $qrcode = QrCode::size(400)->generate($data->name);
        return view('qrcode',compact('qrcode'));
    }
}
NB:
- Function index, serves to display data from the database (data table).
- Function store, serves to add new data into the data table (Data model).
- Function generate, serves to create a QRcode from the data you want to generate into a QR code (name, email or phone number).
10. Open the web.php file in the routes folder, then edit it as below.
<?php
use Illuminate\Support\Facades\Route;
use App\Http\Controllers\DataController;
/*
|--------------------------------------------------------------------------
| Web Routes
|--------------------------------------------------------------------------
|
| Here is where you can register web routes for your application. These
| routes are loaded by the RouteServiceProvider within a group which
| contains the "web" middleware group. Now create something great!
|
*/
Route::get('/', [DataController::class, 'index']);
Route::post('/', [DataController::class, 'store'])->name('store');
Route::get('qrcode/{id}', [DataController::class, 'generate'])->name('generate');
11. Open the welcome.blade.php file in the views folder, then edit it as below.
<!DOCTYPE html>
<html lang="{{ str_replace('_', '-', app()->getLocale()) }}">
    <head>
        <meta charset="utf-8">
        <meta name="viewport" content="width=device-width, initial-scale=1">
        <title>Laravel</title>
        <!-- Fonts -->
        <link href="https://fonts.googleapis.com/css2?family=Nunito:wght@400;600;700&display=swap" rel="stylesheet">
        <!-- Styles -->
        <link rel="stylesheet" href="https://cdn.jsdelivr.net/npm/bootstrap@4.5.3/dist/css/bootstrap.min.css" integrity="sha384-TX8t27EcRE3e/ihU7zmQxVncDAy5uIKz4rEkgIXeMed4M0jlfIDPvg6uqKI2xXr2" crossorigin="anonymous">
        <style>
            body {
                font-family: 'Nunito';
            }
        </style>
    </head>
    <body>
        <div class="container">
            <div class="row mt-5">
                <form class="form-inline" action="{{ route('store') }}" method="POST">
                    @csrf
                    <div class="form-group mb-2">
                      <input type="text" class="form-control" name="name" placeholder="Masukkan Nama">
                    </div>
                    <div class="form-group mb-2 ml-1">
                        <input type="email" class="form-control" name="email" placeholder="Masukkan Email">
                      </div>
                      <div class="form-group mb-2 ml-1">
                        <input type="number" class="form-control" name="phone" placeholder="Masukkan Nomor Telephone">
                      </div>
                    <button type="submit" class="btn btn-primary ml-1 mb-2">Create</button>
                  </form>
                <br>
                <table class="table">
                    <thead>
                      <tr>
                        <th scope="col">Nama</th>
                        <th scope="col">Email</th>
                        <th scope="col">Phone</th>
                        <th scope="col">QR code</th>
                      </tr>
                    </thead>
                    <tbody>
                     @foreach ($data as $data)
                     <tr>
                        <td>{{ $data->name }}</td>
                        <td>{{ $data->email }}</td>
                        <td>{{ $data->phone }}</td>
                        <td>
                            <a href="{{ route('generate',$data->id) }}" class="btn btn-primary">Generate</a>
                        </td>
                      </tr>
                     @endforeach
                    </tbody>
                  </table>
            </div>
        </div>
        <script src="https://code.jquery.com/jquery-3.5.1.slim.min.js" integrity="sha384-DfXdz2htPH0lsSSs5nCTpuj/zy4C+OGpamoFVy38MVBnE+IbbVYUew+OrCXaRkfj" crossorigin="anonymous"></script>
<script src="https://cdn.jsdelivr.net/npm/bootstrap@4.5.3/dist/js/bootstrap.bundle.min.js" integrity="sha384-ho+j7jyWK8fNQe+A12Hb8AhRq26LrZ/JpcUGGOn+Y7RsweNrtN/tE3MoK7ZeZDyx" crossorigin="anonymous"></script>
    </body>
</html>
12. Create a new view file in the views folder with the name qrcode.blade.php to display the QR code later. Then add the code below to the new view file.
<!DOCTYPE html>
<html lang="{{ str_replace('_', '-', app()->getLocale()) }}">
    <head>
        <meta charset="utf-8">
        <meta name="viewport" content="width=device-width, initial-scale=1">
        <title>Laravel</title>
        <!-- Fonts -->
        <link href="https://fonts.googleapis.com/css2?family=Nunito:wght@400;600;700&display=swap" rel="stylesheet">
        <!-- Styles -->
        <style>
            /*! normalize.css v8.0.1 | MIT License | github.com/necolas/normalize.css */html{line-height:1.15;-webkit-text-size-adjust:100%}body{margin:0}a{background-color:transparent}[hidden]{display:none}html{font-family:system-ui,-apple-system,BlinkMacSystemFont,Segoe UI,Roboto,Helvetica Neue,Arial,Noto Sans,sans-serif,Apple Color Emoji,Segoe UI Emoji,Segoe UI Symbol,Noto Color Emoji;line-height:1.5}*,:after,:before{box-sizing:border-box;border:0 solid #e2e8f0}a{color:inherit;text-decoration:inherit}svg,video{display:block;vertical-align:middle}video{max-width:100%;height:auto}.bg-white{--bg-opacity:1;background-color:#fff;background-color:rgba(255,255,255,var(--bg-opacity))}.bg-gray-100{--bg-opacity:1;background-color:#f7fafc;background-color:rgba(247,250,252,var(--bg-opacity))}.border-gray-200{--border-opacity:1;border-color:#edf2f7;border-color:rgba(237,242,247,var(--border-opacity))}.border-t{border-top-width:1px}.flex{display:flex}.grid{display:grid}.hidden{display:none}.items-center{align-items:center}.justify-center{justify-content:center}.font-semibold{font-weight:600}.h-5{height:1.25rem}.h-8{height:2rem}.h-16{height:4rem}.text-sm{font-size:.875rem}.text-lg{font-size:1.125rem}.leading-7{line-height:1.75rem}.mx-auto{margin-left:auto;margin-right:auto}.ml-1{margin-left:.25rem}.mt-2{margin-top:.5rem}.mr-2{margin-right:.5rem}.ml-2{margin-left:.5rem}.mt-4{margin-top:1rem}.ml-4{margin-left:1rem}.mt-8{margin-top:2rem}.ml-12{margin-left:3rem}.-mt-px{margin-top:-1px}.max-w-6xl{max-width:72rem}.min-h-screen{min-height:100vh}.overflow-hidden{overflow:hidden}.p-6{padding:1.5rem}.py-4{padding-top:1rem;padding-bottom:1rem}.px-6{padding-left:1.5rem;padding-right:1.5rem}.pt-8{padding-top:2rem}.fixed{position:fixed}.relative{position:relative}.top-0{top:0}.right-0{right:0}.shadow{box-shadow:0 1px 3px 0 rgba(0,0,0,.1),0 1px 2px 0 rgba(0,0,0,.06)}.text-center{text-align:center}.text-gray-200{--text-opacity:1;color:#edf2f7;color:rgba(237,242,247,var(--text-opacity))}.text-gray-300{--text-opacity:1;color:#e2e8f0;color:rgba(226,232,240,var(--text-opacity))}.text-gray-400{--text-opacity:1;color:#cbd5e0;color:rgba(203,213,224,var(--text-opacity))}.text-gray-500{--text-opacity:1;color:#a0aec0;color:rgba(160,174,192,var(--text-opacity))}.text-gray-600{--text-opacity:1;color:#718096;color:rgba(113,128,150,var(--text-opacity))}.text-gray-700{--text-opacity:1;color:#4a5568;color:rgba(74,85,104,var(--text-opacity))}.text-gray-900{--text-opacity:1;color:#1a202c;color:rgba(26,32,44,var(--text-opacity))}.underline{text-decoration:underline}.antialiased{-webkit-font-smoothing:antialiased;-moz-osx-font-smoothing:grayscale}.w-5{width:1.25rem}.w-8{width:2rem}.w-auto{width:auto}.grid-cols-1{grid-template-columns:repeat(1,minmax(0,1fr))}@media (min-width:640px){.sm\:rounded-lg{border-radius:.5rem}.sm\:block{display:block}.sm\:items-center{align-items:center}.sm\:justify-start{justify-content:flex-start}.sm\:justify-between{justify-content:space-between}.sm\:h-20{height:5rem}.sm\:ml-0{margin-left:0}.sm\:px-6{padding-left:1.5rem;padding-right:1.5rem}.sm\:pt-0{padding-top:0}.sm\:text-left{text-align:left}.sm\:text-right{text-align:right}}@media (min-width:768px){.md\:border-t-0{border-top-width:0}.md\:border-l{border-left-width:1px}.md\:grid-cols-2{grid-template-columns:repeat(2,minmax(0,1fr))}}@media (min-width:1024px){.lg\:px-8{padding-left:2rem;padding-right:2rem}}@media (prefers-color-scheme:dark){.dark\:bg-gray-800{--bg-opacity:1;background-color:#2d3748;background-color:rgba(45,55,72,var(--bg-opacity))}.dark\:bg-gray-900{--bg-opacity:1;background-color:#1a202c;background-color:rgba(26,32,44,var(--bg-opacity))}.dark\:border-gray-700{--border-opacity:1;border-color:#4a5568;border-color:rgba(74,85,104,var(--border-opacity))}.dark\:text-white{--text-opacity:1;color:#fff;color:rgba(255,255,255,var(--text-opacity))}.dark\:text-gray-400{--text-opacity:1;color:#cbd5e0;color:rgba(203,213,224,var(--text-opacity))}}
        </style>
        <link rel="stylesheet" href="https://cdn.jsdelivr.net/npm/bootstrap@4.5.3/dist/css/bootstrap.min.css" integrity="sha384-TX8t27EcRE3e/ihU7zmQxVncDAy5uIKz4rEkgIXeMed4M0jlfIDPvg6uqKI2xXr2" crossorigin="anonymous">
        <style>
            body {
                font-family: 'Nunito';
            }
        </style>
    </head>
    <body>
        <div class="container">
            <div class="row mt-5 text-center">
                {!! $qrcode !!}
            </div>
        </div>
        <script src="https://code.jquery.com/jquery-3.5.1.slim.min.js" integrity="sha384-DfXdz2htPH0lsSSs5nCTpuj/zy4C+OGpamoFVy38MVBnE+IbbVYUew+OrCXaRkfj" crossorigin="anonymous"></script>
<script src="https://cdn.jsdelivr.net/npm/bootstrap@4.5.3/dist/js/bootstrap.bundle.min.js" integrity="sha384-ho+j7jyWK8fNQe+A12Hb8AhRq26LrZ/JpcUGGOn+Y7RsweNrtN/tE3MoK7ZeZDyx" crossorigin="anonymous"></script>
    </body>
</html>
Okay, now we try to run the program by running the server (php artisan serve). Go to url 127.0.0.1:8000 or qrcode.test.
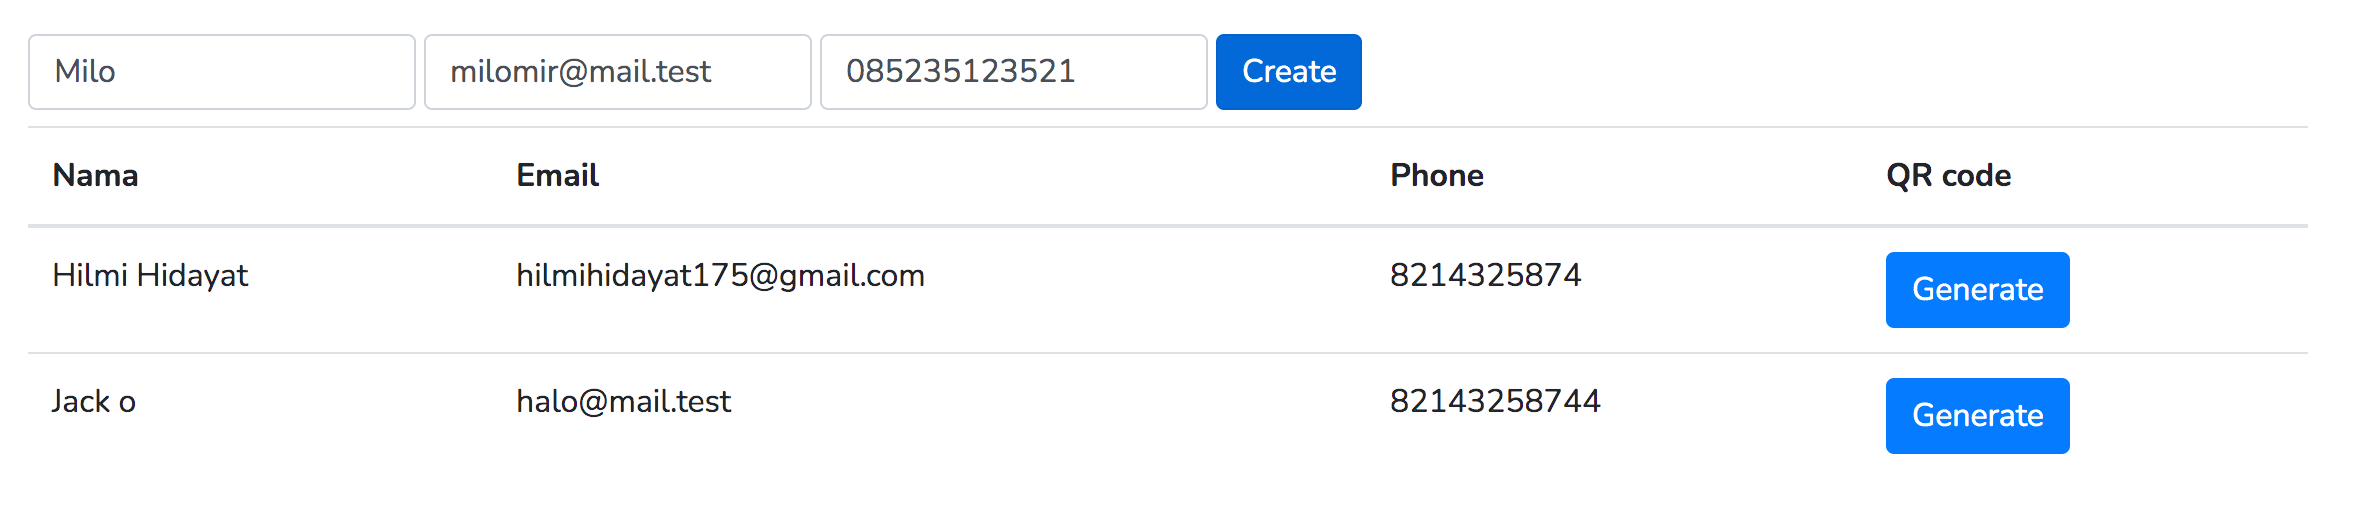
The front page display or from the welcome.blade.php file will be like the picture above, then we try to input data on the 3 existing forms, namely name, email, phone number and then click create to add the data.
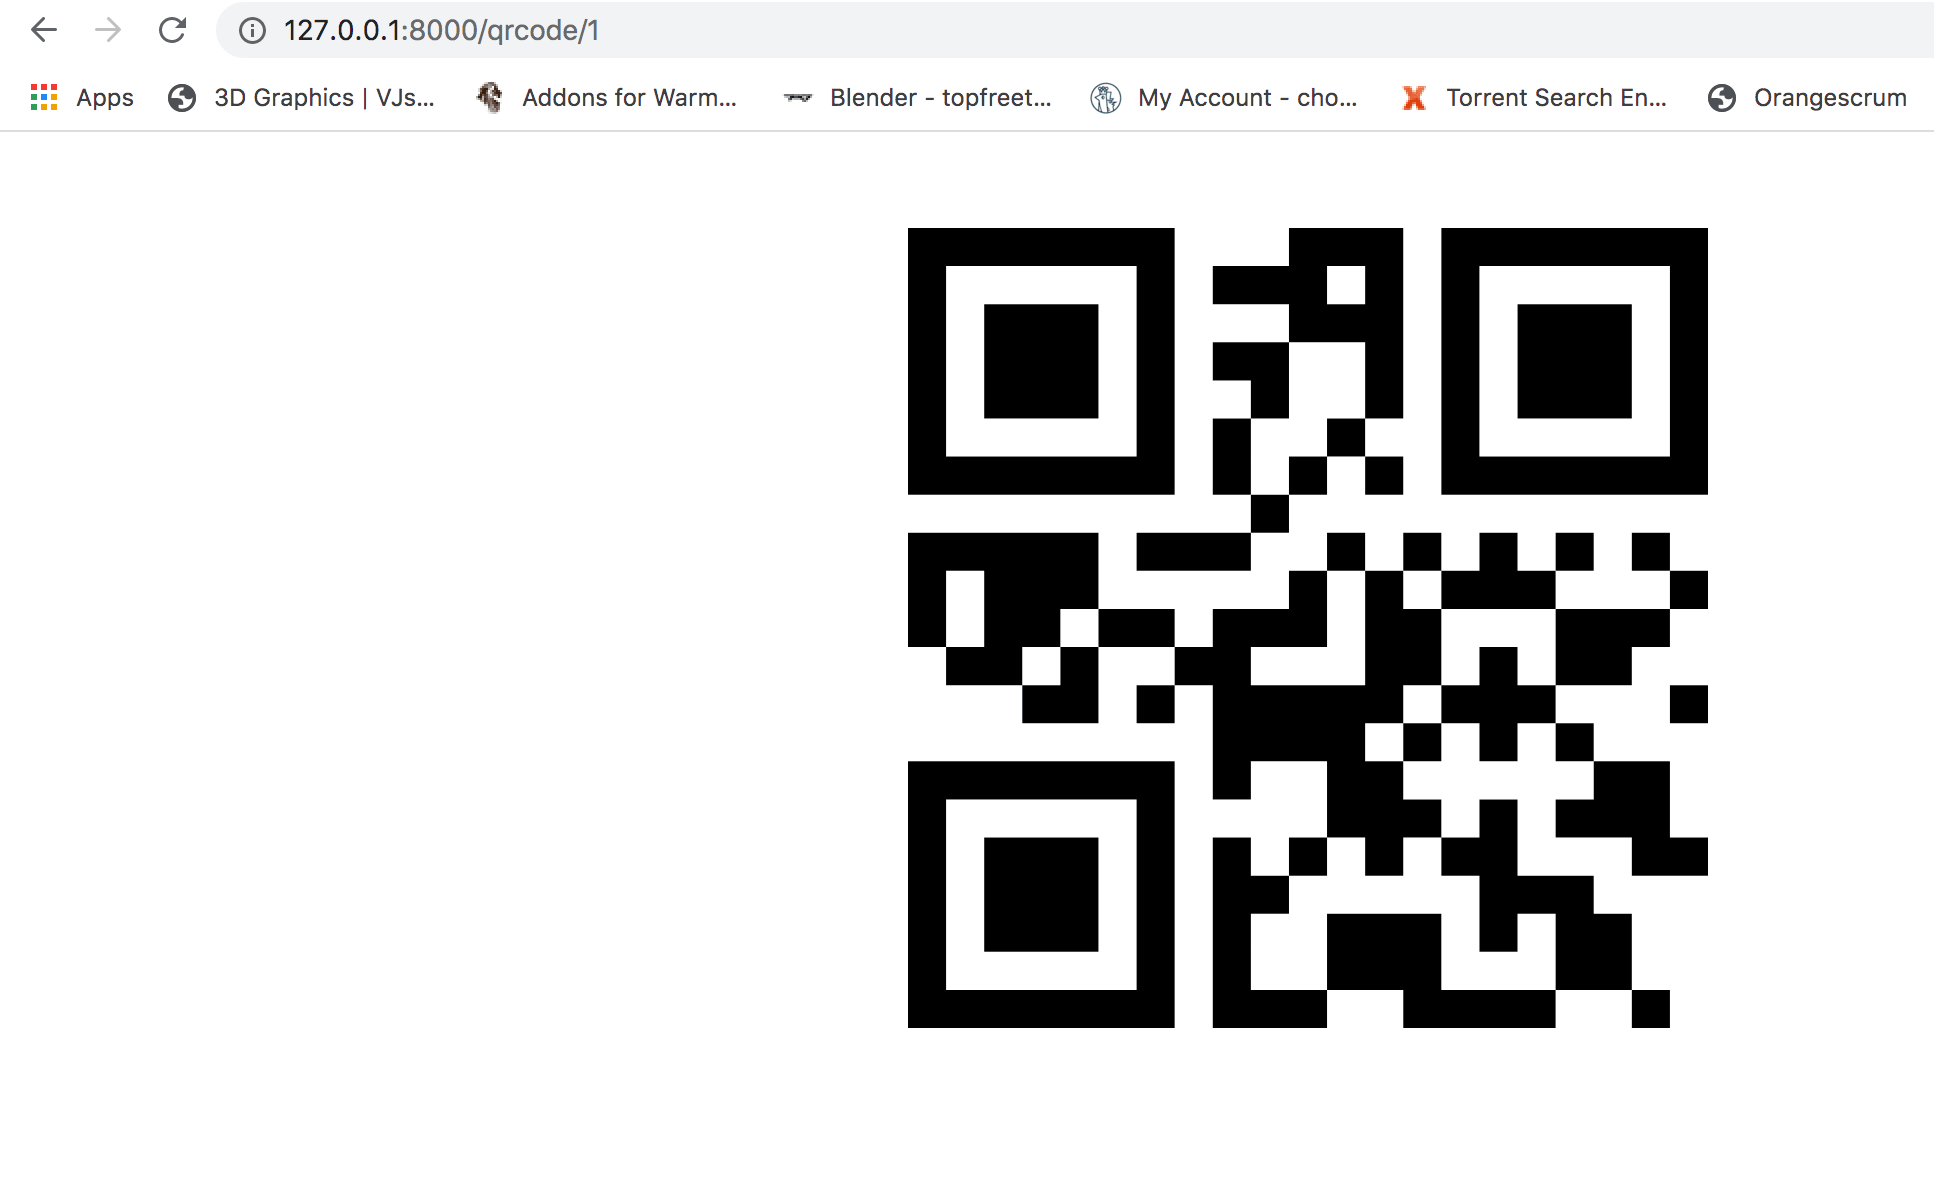
To view the QR code of some existing data, press the Generate button. Then it will display the QR code from the data as can be seen in the image above.
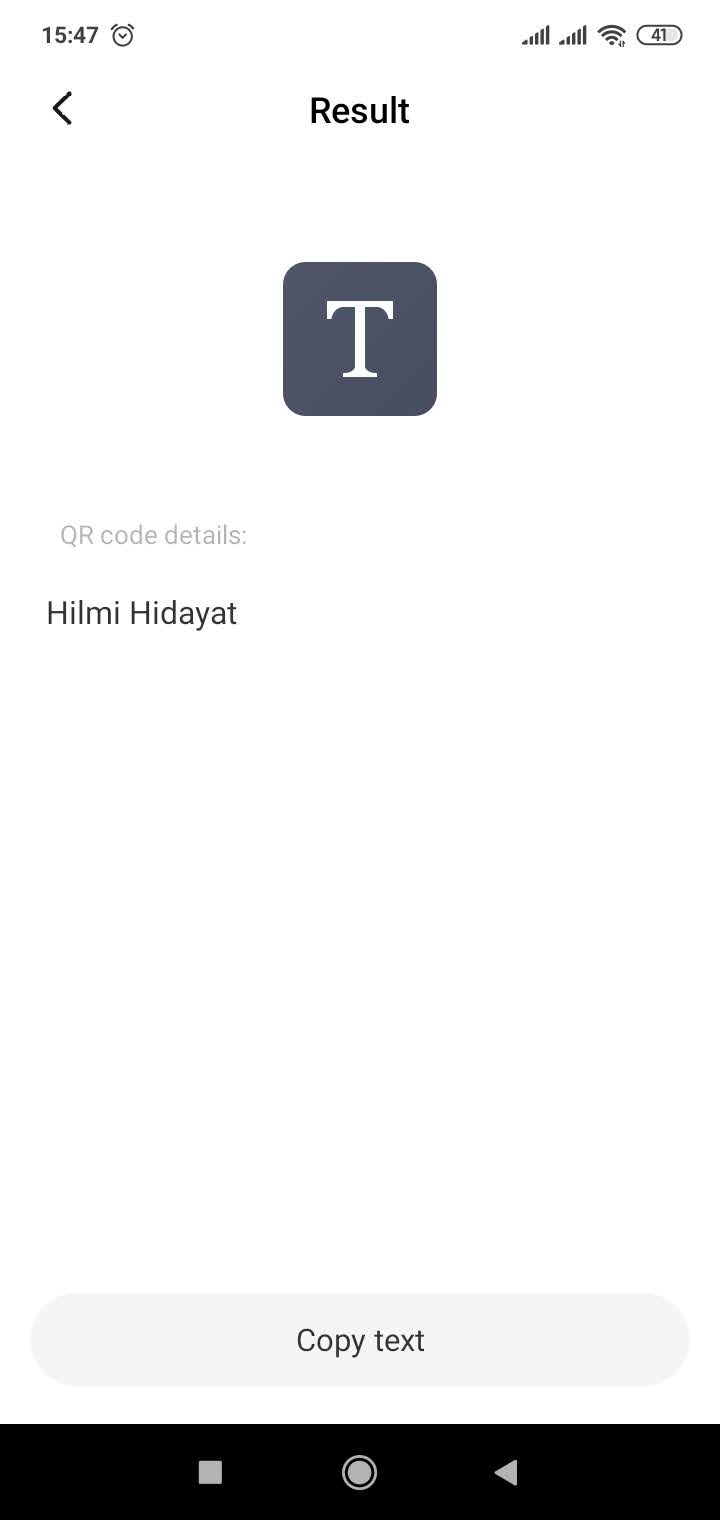
If we try to scan using a cellphone scanner or something else, when the scanner captures the QR code, we will be directed to a page that looks like the image above.
From here, we have succeeded in creating a QR code in Laravel which when we scan it will display the name data. Then how so that when we scan, we are directed to email? like this way;
In the DataController file or rather in the generate function, edit the code to be as below.
public function generate ($id)
    {
        $data = Data::findOrFail($id);
        $qrcode = QrCode::size(400)->email($data->email);
        return view('qrcode',compact('qrcode'));
    }
Save, then try scanning again. Then you will be directed directly to the email.
Then, is it also possible if when we scan, we will be directed directly to the sms? the answer is yes too. We just need to adjust the code in the generate function to be like this:
public function generate ($id)
    {
        $data = Data::findOrFail($id);
        $qrcode = QrCode::size(400)->SMS($data->phone);
        return view('qrcode',compact('qrcode'));
    }
If you want to be directed to the phone, you can also, the way is to just change the code in the generate function to be as below.
public function generate ($id)
    {
        $data = Data::findOrFail($id);
        $qrcode = QrCode::size(400)->phoneNumber($data->phone);
        return view('qrcode',compact('qrcode'));
    }
Thus the article on how to make a QR code with a Simple QR code in Laravel, for more details about using this Simple QR code, please visit the official Simple QR code website at simplesoftware.io. If there is anything you want to ask, discuss or correct from this article, please write a comment below.
- Cara Mengatasi Error XAMPP: MySQL shutdown unexpectedly 23 Oktober 2021 68206 views
- Tutorial CRUD (Create, Read, Update & Delete) Codeigniter 4 dengan Bootstrap 14 Oktober 2021 33667 views
- Laravel 8: REST API Authentication dengan Sanctum 17 September 2021 32643 views
- Membuat REST API CRUD di Laravel 8 dengan Sanctum 18 September 2021 28833 views
- Contoh Cara Menggunakan Sweet Alert di Laravel 8 27 Agustus 2021 28201 views