How To Send Email With Gmail In Laravel
Send Email With Gmail In Laravel - In this article, I will share how easy it is to create a send email feature using Gmail in Laravel.
Alright, the first thing to prepare is the Laravel project. Here I will install laravel with the project name "laramail" with the command as below.

Then open the newly installed project, configure the .env file. Customize the .env file in this section.
MAIL_MAILER=smtp
MAIL_HOST=smtp.googlemail.com
MAIL_PORT=587
MAIL_USERNAME=email@gmail.com #Email kamu
MAIL_PASSWORD=password#password email kamu
MAIL_ENCRYPTION=tls
MAIL_FROM_ADDRESS=email@gmail.com
MAIL_FROM_NAME= "Test Laravel Mail"
Because I will send an email using a service from gmail, then in the .env file in the MAIL_HOST section I fill in smtp.googlemail.com and my MAIL_PORT is 587.
Before proceeding to the next step, here we have to make sure that the gmail or google account that we use to send email is in a less active application access condition as shown below.
Link: myaccount.google.com
If you have, then I will create a mailable class to send email in laravel with the artisan command as below.

With the artisan command above, I've managed to generate a mailable class located in the App\Mail directory.
Open the TestMail.php file located in the App\Mail directory, change the source code to be as below.
<?php
namespace App\Mail;
use Illuminate\Bus\Queueable;
use Illuminate\Contracts\Queue\ShouldQueue;
use Illuminate\Mail\Mailable;
use Illuminate\Queue\SerializesModels;
class TestMail extends Mailable
{
    use Queueable, SerializesModels;
    /**
     * Create a new message instance.
     *
     * @return void
     */
    public function __construct()
    {
        //
    }
    /**
     * Build the message.
     *
     * @return $this
     */
    public function build()
    {
        return $this->view('testmail');
    }
}
With the source code above, I will send an email with the view I got from the testmail.blade.php file in the views folder.
Next we have to create the testmail.blade.php file which we have called with the source code above. For testing, we can fill the file testmail.blade.php with the text below.
This is a test email with gmail in laravel
Then open the web.php file located in the route directory, then adjust the source code as below.
<?php
use Illuminate\Support\Facades\Route;
use App\Mail\TestMail;
use Illuminate\Support\Facades\Mail;
/*
|--------------------------------------------------------------------------
| Web Routes
|--------------------------------------------------------------------------
|
| Here is where you can register web routes for your application. These
| routes are loaded by the RouteServiceProvider within a group which
| contains the "web" middleware group. Now create something great!
|
*/
Route::get('/', function () {
    Mail::to('yourmail@gmail.com')->send(new TestMail());
    return view('welcome');
});
The purpose of the code above, when we access the front page of the project, an email will be sent to the email that has been addressed. Don't forget to import the mailable class that we created using App\Mail\TestMail and don't forget to import the facade mail using Mail or use Illuminate\Support\Facades\Mail.
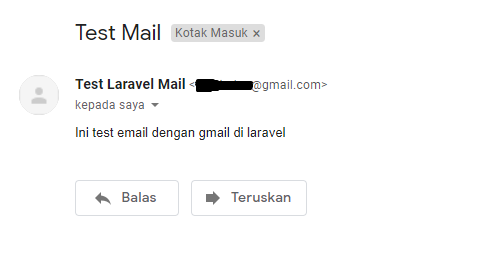
If so, try running php artisan serve and access the front page, then the email will be sent as shown below.

So far, we have managed to send a gmail email with view format in laravel. Next we will try to send a gmail email with markdown format in laravel.
Immediately, we will return to the terminal and run the artisan command as below

With the above command, we have created a new mailable class with the name TestMailMarkdown.php located in the App\Mail directory and have successfully created a view with the name markdown.blade.php located in the views\emails directory.
Then we will add the code in route/web.php as below, so that when we access 127.0.0.1:8000/markdown or app_url/markdown it will send a gmail email with markdown format.
Route::get('/markdown', function () {
    Mail::to('yourmail@gmail.com')->send(new TestMailMarkdown());
    return view('welcome');
});
don't forget to import the mailable class using App\Mail\TestMailMarkdown. So that the overall source code in the web.php file is now as below.
<?php
use Illuminate\Support\Facades\Route;
use App\Mail\TestMail;
use App\Mail\TestMailMarkdown;
use Illuminate\Support\Facades\Mail;
/*
|--------------------------------------------------------------------------
| Web Routes
|--------------------------------------------------------------------------
|
| Here is where you can register web routes for your application. These
| routes are loaded by the RouteServiceProvider within a group which
| contains the "web" middleware group. Now create something great!
|
*/
Route::get('/', function () {
    Mail::to('yourmail@gmail.com')->send(new TestMail());
    return view('welcome');
});
Route::get('/markdown', function () {
    Mail::to('yourmail@gmail.com')->send(new TestMailMarkdown());
    return view('welcome');
});
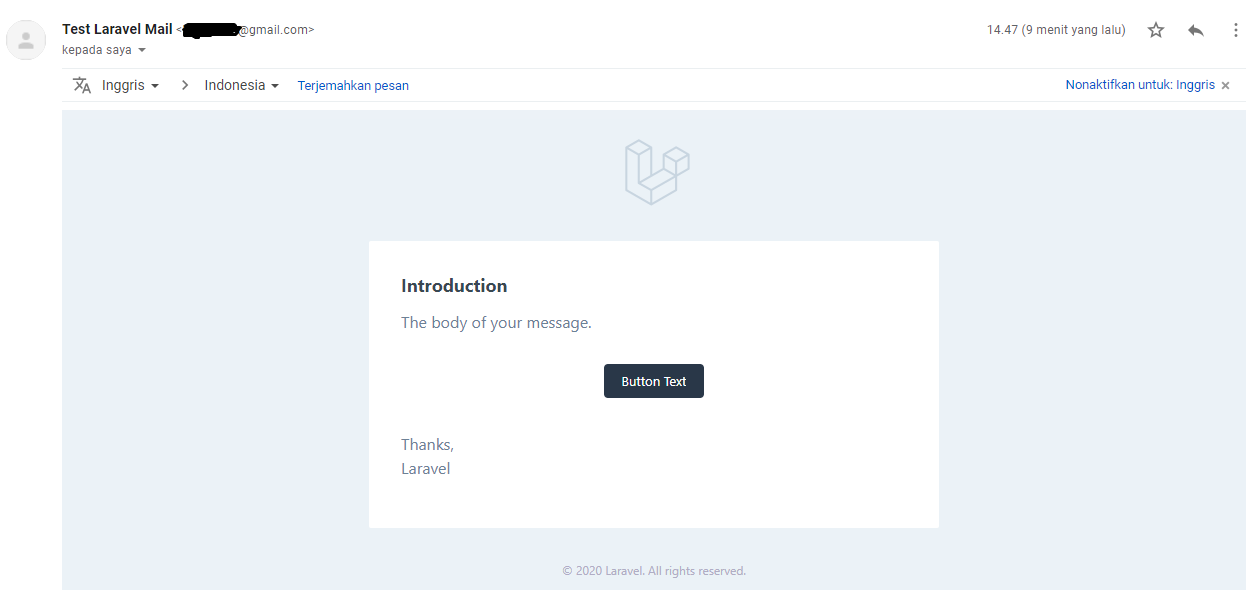
Then, if we try to access 127.0.0.1:8000/markdown or app_url/markdown it will send a gmail email with markdown format as shown below.

To change its appearance, we can make adjustments in the markdown.blade.php file in the views\emails directory.
And to change the logo on the email, we can change it in the header.blade.php file in the views\vendor\mail directory but we must first run artisan publish as below.
php artisan vendor:publish --tag=laravel-mailFrom here, we have succeeded in making send email with gmail in laravel using view and markdown formats. Next, we will implement it with a simple flow, namely when the user registers, the user will receive an email information that the user has successfully registered on our website.
Send Gmail Email After Register
First, we will create authentication in laravel with the command below.
composer require laravel/ui
php artisan ui vue --auth
npm install && npm run dev
Then create a new database & adjust also on the .env file as below.
DB_CONNECTION=mysql
DB_HOST=127.0.0.1
DB_PORT=3306
DB_DATABASE=tester
DB_USERNAME=root
DB_PASSWORD=
Here to run this practice project, I use the database tester that I have created. Next run the artisan migrate command as below in the terminal.
php artisan migrateThen, run php artisan serve again.

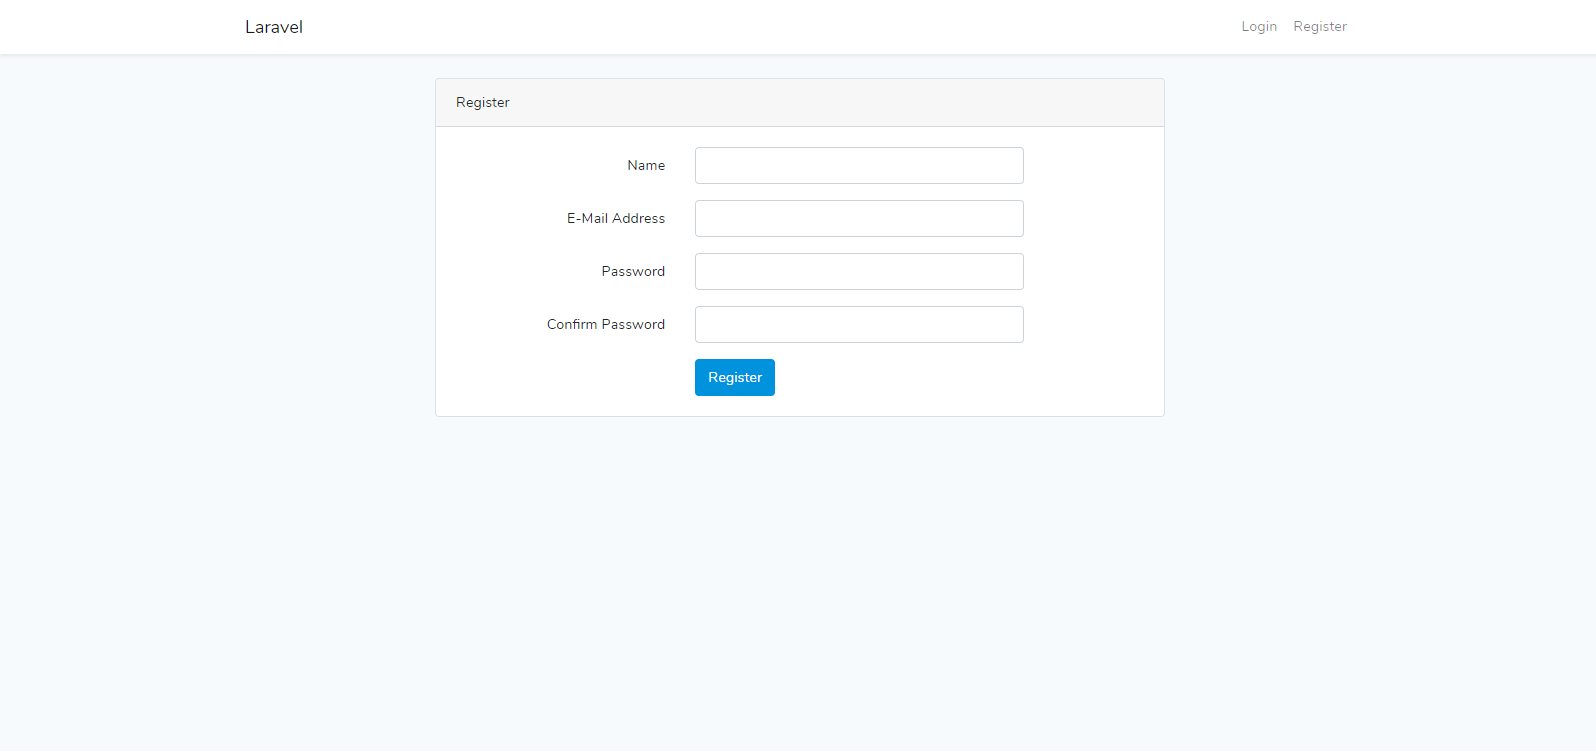
So far, we have been able to login and register but have not been able to send emails.
Next, We will create a new mailable class to send email after registering with the name UserRegisterMail.php or by running artisan command as below

Here we use view format to send email with gmail in laravel after registering.
Open the UserRegisterMail.php file, adjust the source code to be as below.
<?php
namespace App\Mail;
use Illuminate\Bus\Queueable;
use Illuminate\Contracts\Queue\ShouldQueue;
use Illuminate\Mail\Mailable;
use Illuminate\Queue\SerializesModels;
class UserRegisterMail extends Mailable
{
    use Queueable, SerializesModels;
    /**
     * Create a new message instance.
     *
     * @return void
     */
    public function __construct()
    {
        //
    }
    /**
     * Build the message.
     *
     * @return $this
     */
    public function build()
    {
        return $this->view('emails.userregister');
    }
}
Then create a new blade file with the name userregister.blade.php in the views\emails directory and enter the source code as below.
<!doctype html>
<html>
<head>
<meta name="viewport" content="width=device-width" />
<meta http-equiv="Content-Type" content="text/html; charset=UTF-8" />
<title>Simple Transactional Email</title>
<style>
/* -------------------------------------
GLOBAL RESETS
------------------------------------- */
/*All the styling goes here*/
img {
border: none;
-ms-interpolation-mode: bicubic;
max-width: 100%;
}
body {
background-color: #f6f6f6;
font-family: sans-serif;
-webkit-font-smoothing: antialiased;
font-size: 14px;
line-height: 1.4;
margin: 0;
padding: 0;
-ms-text-size-adjust: 100%;
-webkit-text-size-adjust: 100%;
}
table {
border-collapse: separate;
mso-table-lspace: 0pt;
mso-table-rspace: 0pt;
width: 100%; }
table td {
font-family: sans-serif;
font-size: 14px;
vertical-align: top;
}
/* -------------------------------------
BODY & CONTAINER
------------------------------------- */
.body {
background-color: #f6f6f6;
width: 100%;
}
/* Set a max-width, and make it display as block so it will automatically stretch to that width, but will also shrink down on a phone or something */
.container {
display: block;
margin: 0 auto !important;
/* makes it centered */
max-width: 580px;
padding: 10px;
width: 580px;
}
/* This should also be a block element, so that it will fill 100% of the .container */
.content {
box-sizing: border-box;
display: block;
margin: 0 auto;
max-width: 580px;
padding: 10px;
}
/* -------------------------------------
HEADER, FOOTER, MAIN
------------------------------------- */
.main {
background: #ffffff;
border-radius: 3px;
width: 100%;
}
.wrapper {
box-sizing: border-box;
padding: 20px;
}
.content-block {
padding-bottom: 10px;
padding-top: 10px;
}
.footer {
clear: both;
margin-top: 10px;
text-align: center;
width: 100%;
}
.footer td,
.footer p,
.footer span,
.footer a {
color: #999999;
font-size: 12px;
text-align: center;
}
/* -------------------------------------
TYPOGRAPHY
------------------------------------- */
h1,
h2,
h3,
h4 {
color: #000000;
font-family: sans-serif;
font-weight: 400;
line-height: 1.4;
margin: 0;
margin-bottom: 30px;
}
h1 {
font-size: 35px;
font-weight: 300;
text-align: center;
text-transform: capitalize;
}
p,
ul,
ol {
font-family: sans-serif;
font-size: 14px;
font-weight: normal;
margin: 0;
margin-bottom: 15px;
}
p li,
ul li,
ol li {
list-style-position: inside;
margin-left: 5px;
}
a {
color: #3498db;
text-decoration: underline;
}
/* -------------------------------------
BUTTONS
------------------------------------- */
.btn {
box-sizing: border-box;
width: 100%; }
.btn > tbody > tr > td {
padding-bottom: 15px; }
.btn table {
width: auto;
}
.btn table td {
background-color: #ffffff;
border-radius: 5px;
text-align: center;
}
.btn a {
background-color: #ffffff;
border: solid 1px #3498db;
border-radius: 5px;
box-sizing: border-box;
color: #3498db;
cursor: pointer;
display: inline-block;
font-size: 14px;
font-weight: bold;
margin: 0;
padding: 12px 25px;
text-decoration: none;
text-transform: capitalize;
}
.btn-primary table td {
background-color: #3498db;
}
.btn-primary a {
background-color: #3498db;
border-color: #3498db;
color: #ffffff;
}
/* -------------------------------------
OTHER STYLES THAT MIGHT BE USEFUL
------------------------------------- */
.last {
margin-bottom: 0;
}
.first {
margin-top: 0;
}
.align-center {
text-align: center;
}
.align-right {
text-align: right;
}
.align-left {
text-align: left;
}
.clear {
clear: both;
}
.mt0 {
margin-top: 0;
}
.mb0 {
margin-bottom: 0;
}
.preheader {
color: transparent;
display: none;
height: 0;
max-height: 0;
max-width: 0;
opacity: 0;
overflow: hidden;
mso-hide: all;
visibility: hidden;
width: 0;
}
.powered-by a {
text-decoration: none;
}
hr {
border: 0;
border-bottom: 1px solid #f6f6f6;
margin: 20px 0;
}
/* -------------------------------------
RESPONSIVE AND MOBILE FRIENDLY STYLES
------------------------------------- */
@media only screen and (max-width: 620px) {
table[class=body] h1 {
font-size: 28px !important;
margin-bottom: 10px !important;
}
table[class=body] p,
table[class=body] ul,
table[class=body] ol,
table[class=body] td,
table[class=body] span,
table[class=body] a {
font-size: 16px !important;
}
table[class=body] .wrapper,
table[class=body] .article {
padding: 10px !important;
}
table[class=body] .content {
padding: 0 !important;
}
table[class=body] .container {
padding: 0 !important;
width: 100% !important;
}
table[class=body] .main {
border-left-width: 0 !important;
border-radius: 0 !important;
border-right-width: 0 !important;
}
table[class=body] .btn table {
width: 100% !important;
}
table[class=body] .btn a {
width: 100% !important;
}
table[class=body] .img-responsive {
height: auto !important;
max-width: 100% !important;
width: auto !important;
}
}
/* -------------------------------------
PRESERVE THESE STYLES IN THE HEAD
------------------------------------- */
@media all {
.ExternalClass {
width: 100%;
}
.ExternalClass,
.ExternalClass p,
.ExternalClass span,
.ExternalClass font,
.ExternalClass td,
.ExternalClass div {
line-height: 100%;
}
.apple-link a {
color: inherit !important;
font-family: inherit !important;
font-size: inherit !important;
font-weight: inherit !important;
line-height: inherit !important;
text-decoration: none !important;
}
#MessageViewBody a {
color: inherit;
text-decoration: none;
font-size: inherit;
font-family: inherit;
font-weight: inherit;
line-height: inherit;
}
.btn-primary table td:hover {
background-color: #34495e !important;
}
.btn-primary a:hover {
background-color: #34495e !important;
border-color: #34495e !important;
}
}
</style>
</head>
<body class="">
<span class="preheader">This is preheader text. Some clients will show this text as a preview.</span>
<table role="presentation" border="0" cellpadding="0" cellspacing="0" class="body">
<tr>
<td> </td>
<td class="container">
<div class="content">
<!-- START CENTERED WHITE CONTAINER -->
<table role="presentation" class="main">
<!-- START MAIN CONTENT AREA -->
<tr>
<td class="wrapper">
<table role="presentation" border="0" cellpadding="0" cellspacing="0">
<tr>
<td>
<p>Dear Customer,</p>
<p>Terimakasih banyak sudah tertarik bergabung bersama kami.</p>
<br>
<p>Best Regards</p><br>
<p>Admin</p>
</td>
</tr>
</table>
</td>
</tr>
<!-- END MAIN CONTENT AREA -->
</table>
<!-- END CENTERED WHITE CONTAINER -->
<!-- START FOOTER -->
<div class="footer">
<table role="presentation" border="0" cellpadding="0" cellspacing="0">
<tr>
<td class="content-block">
<span class="apple-link">Company Inc, 3 Abbey Road, San Francisco CA 94102</span>
</td>
</tr>
</table>
</div>
<!-- END FOOTER -->
</div>
</td>
<td> </td>
</tr>
</table>
</body>
</html>Then open the RegistersUsers.php file in the vendor\laravel\ui\auth-backend directory, adjust the source code to be as below.
<?php
namespace Illuminate\Foundation\Auth;
use Illuminate\Auth\Events\Registered;
use Illuminate\Http\Request;
use Illuminate\Http\Response;
use Illuminate\Support\Facades\Auth;
use Mail;
use App\Mail\UserRegisterMail;
trait RegistersUsers
{
    use RedirectsUsers;
    /**
     * Show the application registration form.
     *
     * @return \Illuminate\View\View
     */
    public function showRegistrationForm()
    {
        return view('auth.register');
    }
    /**
     * Handle a registration request for the application.
     *
     * @param  \Illuminate\Http\Request  $request
     * @return \Illuminate\Http\Response
     */
    public function register(Request $request)
    {
        $this->validator($request->all())->validate();
        event(new Registered($user = $this->create($request->all())));
        Mail::to($request->email)->send(new UserRegisterMail());
        $this->guard()->login($user);
        if ($response = $this->registered($request, $user)) {
            return $response;
        }
        return $request->wantsJson()
                    ? new Response('', 201)
                    : redirect($this->redirectPath());
    }
    /**
     * Get the guard to be used during registration.
     *
     * @return \Illuminate\Contracts\Auth\StatefulGuard
     */
    protected function guard()
    {
        return Auth::guard();
    }
    /**
     * The user has been registered.
     *
     * @param  \Illuminate\Http\Request  $request
     * @param  mixed  $user
     * @return mixed
     */
    protected function registered(Request $request, $user)
    {
        //
    }
}
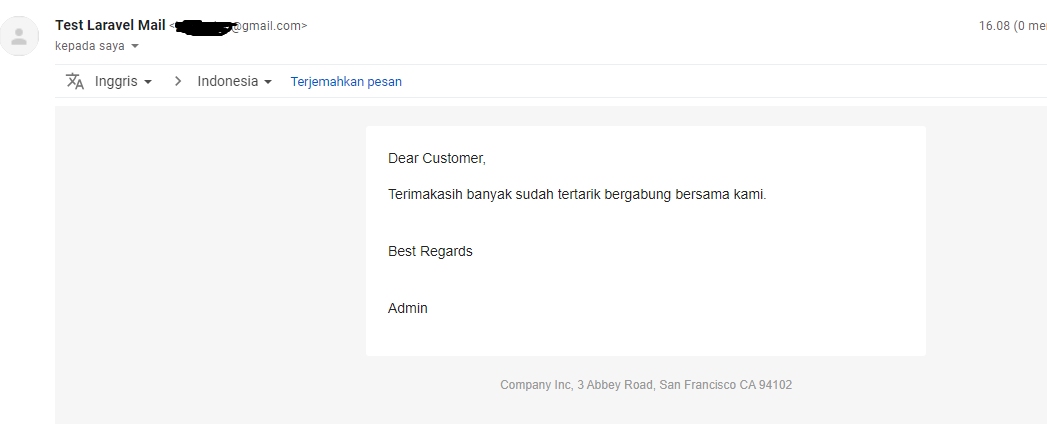
OK, now if you try to register then you will receive an email that looks like the one below.

Thus laravel notes on how to send email with gmail in laravel. The conclusion of this article, sending email in laravel is very easy, we can use smtp, mailgun, ses and others. The documentation in lararvel that discusses mail is here https://laravel.com/docs/7.x/mail#introduction.
- Cara Mengatasi Error XAMPP: MySQL shutdown unexpectedly 23 Oktober 2021 68270 views
- Tutorial CRUD (Create, Read, Update & Delete) Codeigniter 4 dengan Bootstrap 14 Oktober 2021 33770 views
- Laravel 8: REST API Authentication dengan Sanctum 17 September 2021 32659 views
- Membuat REST API CRUD di Laravel 8 dengan Sanctum 18 September 2021 28847 views
- Contoh Cara Menggunakan Sweet Alert di Laravel 8 27 Agustus 2021 28221 views


