


How to Create an SMS Broadcast or SMS Portal with Laravel 8 and Twilio
SMS Laravel 8 Twilio - Previously, we have shared an article that discusses how to make account verification with a telephone number (OTP) in Laravel 8 and Twilio. And in this article, we will share another article about using the Programmable Messaging API service from Twilio on a laravel project, namely creating an sms portal to send sms messages or broadcast sms.
Read:
What is an SMS portal? Why do we make SMS portal with laravel 8?
In a system, it may also be necessary to have a notification feature to provide important information to users, such as via web push, whatsapp, email, telephone calls or SMS. Some methods of providing important information or notifications to users require an internet network except for giving notifications via SMS. Push notification via SMS is an option that is widely chosen by system or application developers because it is a method that does not require an internet network, so users who have difficulty getting a good internet network can still receive or receive SMS notifications.
Have you ever received an SMS like OTP code information? spam sms like online loan offers? or sms like notification of winning hundreds of millions of prizes?
Well, in this tutorial later, we will try to make a simple system for broadcast sms to send sms messages to several contacts or telephone numbers at once.
The scenario in this experiment is that when we add contact data, it will send an SMS notification that the contact data has been successfully added. In addition, we will also try to create a simple system for broadcasting SMS to contact data (telephone numbers) registered in the database. For broadcast sms, this seems similar to the system used or used by several parties who usually spread spam sms.
Table of Contents
Register Twilio Account
Before installing laravel 8 to start creating the feature to send sms or broadcast sms, we need to register an account on Twilio first. For that, please visit the official Twilio website, then click Sign up.
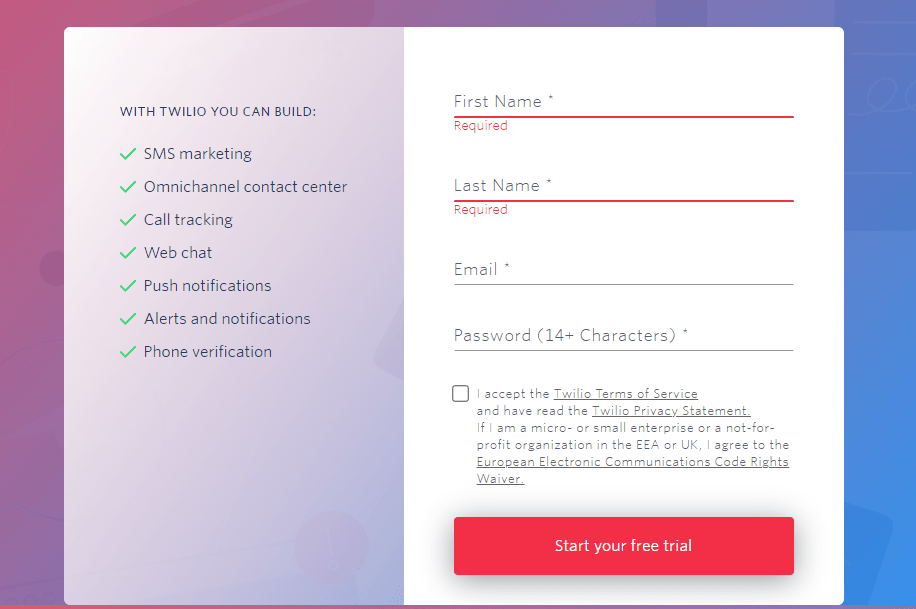
On the registration page, enter the first name, last name, email and password data, then click the checkbox and click the Start your free trial button. You will then be directed to the phone number verification page.
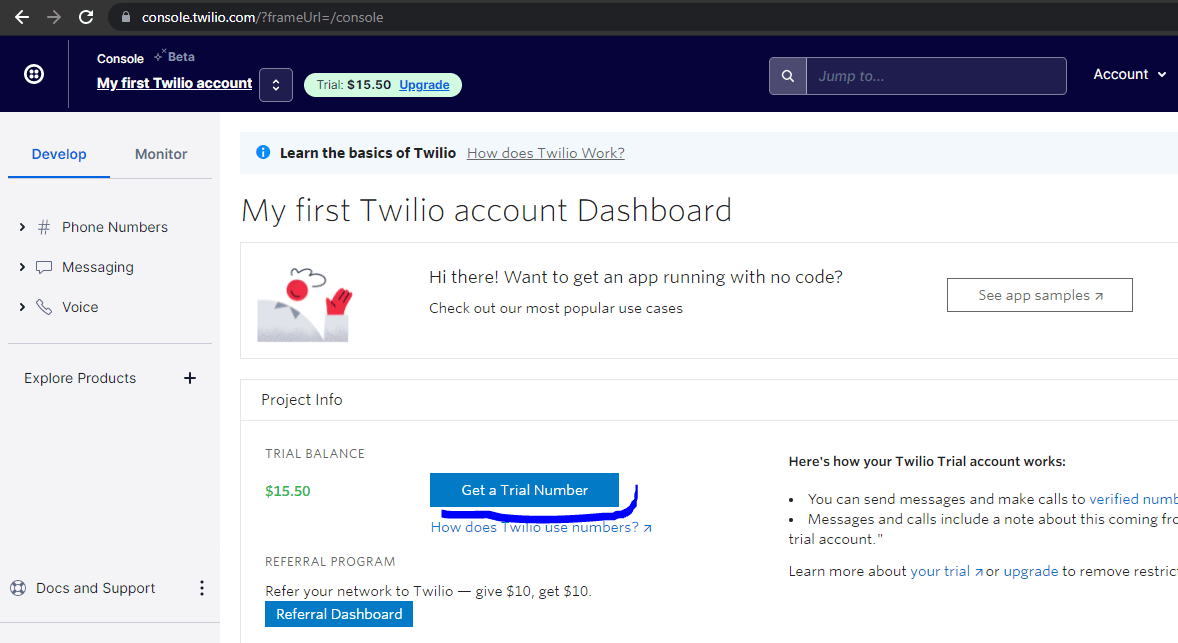
Ok, if you have successfully registered a Twilio account, we will be directed to the dashboard page. So far, we have managed to get a trial balance of $15.50 which we can use to try to create an SMS broadcast system or SMS portal in Laravel 8 with Twilio. If the trial balance is up and we still want to make a free trial, we can register a new account again with a different email and the same phone number. But if you don't want to register an account again, you can upgrade pro at the price listed on the pricing page.
To create a simple SMS portal or broadcast sms system with Laravel 8 and Twilio, we need to get a trial number from Twilio. Please click the Get a Trial Number button to get a trial number.
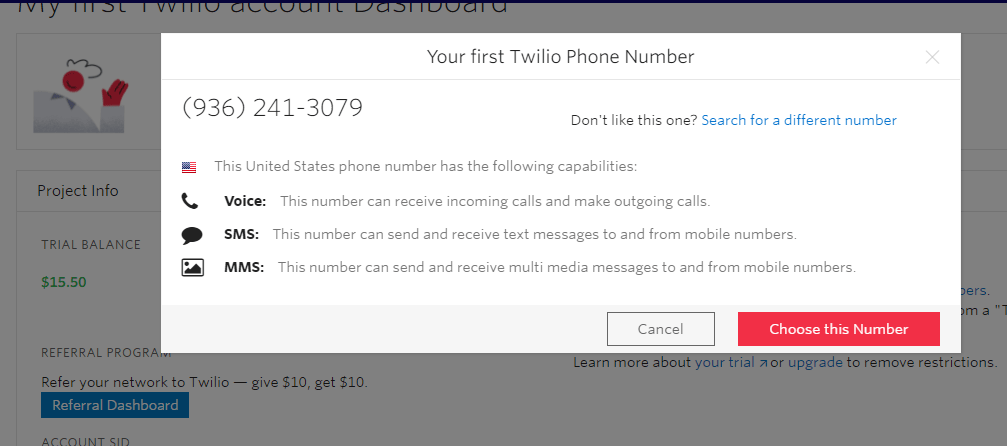
By pressing the Get a Trial Number button, a pop up will appear as shown above. At this step, please just click Choose this Number. Ok, until here we have got what we will need to create an sms portal or broadcast sms with laravel 8 and Twilio, namely;
TWILIO_SID="INSERT YOUR TWILIO SID HERE"
TWILIO_AUTH_TOKEN="INSERT YOUR TWILIO TOKEN HERE"
TWILIO_NUMBER="INSERT YOUR TWILIO NUMBER"
We will use the 3 point SID, Token and Number from Twilio for configuration in the .env file later. *Everything can be seen on the Twilio dashboard.
Install Laravel 8
composer create-project laravel/laravel sms-portal-laravel-twilioAfter going through the Twilio account registration process and we have received the SID code, Auth Token and Twilio Number, we will continue coding to start creating a simple SMS portal system with Laravel 8 and Twilio. Open a terminal, navigate to the directory where we want to place this laravel project and run the install laravel command as above. With the command above, it will run the installation process with the project name sms-portal-laravel-Twilio. If the process is complete, go to the project directory with cd sms-portal-laravel-twilio.
Install Twilio SDK Package
composer require twilio/sdkTo be able to use Twilio services in laravel 8, we need to install the Twilio SDK package. Run the command as above to start installing the Twilio SDK package. If the process is complete, now we can use the services of Twilio.
Creating Databases and Setup .ENV
DB_CONNECTION=mysql
DB_HOST=127.0.0.1
DB_PORT=3306
DB_DATABASE=sms-portal-laravel-twilio
DB_USERNAME=root
DB_PASSWORD=
......................
......................
TWILIO_SID="INSERT YOUR TWILIO SID HERE"
TWILIO_AUTH_TOKEN="INSERT YOUR TWILIO TOKEN HERE"
TWILIO_NUMBER="INSERT YOUR TWILIO NUMBER"
We need to create a new database to create a contact table which we will later use to store contact data or telephone numbers. If we use XAMPP as a local server, we can just create a new database at localhost/phpmyadmin.
If you have created a new database, don't forget to adjust the DB_DATABASE in the .ENV file. Then also add Twilio credentials for the Twilio_SID, Twilio_AUTH and Twilio_NUMBER values. *Twilio credentials can be found on the Twilio dashboard.
Creating a Contact Model & Migration File
php artisan make:model Contact -mNext we need to create model and migration files for contacts, for that please run the command above to generate both files. The above command will generate 2 files located in /app/Models/Contact.php and /databases/migrations/[timestamp]_create_contacts_table.php.
<?php

use Illuminate\Database\Migrations\Migration;
use Illuminate\Database\Schema\Blueprint;
use Illuminate\Support\Facades\Schema;

class CreateContactsTable extends Migration
{
    /**
     * Run the migrations.
     *
     * @return void
     */
    public function up()
    {
        Schema::create('contacts', function (Blueprint $table) {
            $table->id();
            $table->string('phone')->unique();
            $table->timestamps();
        });
    }

    /**
     * Reverse the migrations.
     *
     * @return void
     */
    public function down()
    {
        Schema::dropIfExists('contacts');
    }
}
Then open the [timestamp]_create_contacts_table.php file that we just created in the previous step. In this tutorial, we make it simple by only creating 1 field in the contact table, namely phone which has a unique value.
php artisan migrateIf so, just run the php artisan migrate command to migrate the migration files to the database that we have created.
Create Controller
php artisan make:controller HomeControllerRun the command as above to generate the HomeController file. We will use this controller file to create the logic of a simple SMS portal or SMS broadcast system that we created using Laravel 8 and Twilio.
<?php
namespace App\Http\Controllers;

use App\Models\Contact;
use Illuminate\Http\Request;
use Twilio\Rest\Client;

class HomeController extends Controller
{

    public function index()
    {
        $users = Contact::all();
        return view('welcome', ['users' => $users]);
    }

    public function store(Request $request)
    {
        \Validator::make($request->all(), [
            'phone' => 'required|unique:contacts|numeric'
        ])->validate();

        $contact = new Contact;
        $contact->phone = $request->phone;
        $contact->save();

        $this->sendMessage('Contact registered successfully!!', $request->phone);
        return back()->with(['success' => "{$request->phone} registered"]);
    }

    public function sendCustomMessage(Request $request)
    {
        \Validator::make($request->all(), [
            'contact' => 'required|array',
            'body' => 'required',
        ])->validate();
        $recipients = $request->contact;

        foreach ($recipients as $recipient) {
            $this->sendMessage($request->body, $recipient);
        }
        return back()->with(['success' => "Message on its way to recipients!"]);
    }

    private function sendMessage($message, $recipients)
    {
        $account_sid = getenv("TWILIO_SID");
        $auth_token = getenv("TWILIO_AUTH_TOKEN");
        $twilio_number = getenv("TWILIO_NUMBER");
        $client = new Client($account_sid, $auth_token);
        $client->messages->create($recipients, ['from' => $twilio_number, 'body' => $message]);
    }
}
Open the HomeController.php file that we just created, then copy the code above and paste it in the controller file. In the code above we create several methods including:
- Index, to display the view of the welcome.blade.php file with users data taken from the Contact model.
- Store, is called when we add new contact data and will save the new contact data to the Contact model or contacts table.
- sendCustomMessage, is used when we run an SMS broadcast command with a custom message or according to what we have entered in the textarea.
- sendMessage, is used to send SMS messages either when adding contact data or when broadcasting SMS with custom messages. In this sendMessage method we also define the Twilio credentials taken from the .env file.
Create Route
<?php

use Illuminate\Support\Facades\Route;
use App\Http\Controllers\HomeController;
/*
|--------------------------------------------------------------------------
| Web Routes
|--------------------------------------------------------------------------
|
| Here is where you can register web routes for your application. These
| routes are loaded by the RouteServiceProvider within a group which
| contains the "web" middleware group. Now create something great!
|
*/

Route::get('/', [HomeController::class,'index']);
Route::post('/',  [HomeController::class,'store']);
Route::post('/custom',  [HomeController::class,'sendCustomMessage']);
Open the routes/web.php file, then change or add the route as in the code above. With this code, we create a route for the project root view, a post route to add contact data and a post (/custom) route to send SMS broadcasts with custom messages or according to what we have inputted.
Setup View
<!doctype html>
<html lang="en">
    <head>
        <!-- Required meta tags -->
        <meta charset="utf-8">
        <meta name="viewport" content="width=device-width, initial-scale=1">
        <!-- Bootstrap CSS -->
        <link href="https://cdn.jsdelivr.net/npm/bootstrap@5.0.2/dist/css/bootstrap.min.css" rel="stylesheet" integrity="sha384-EVSTQN3/azprG1Anm3QDgpJLIm9Nao0Yz1ztcQTwFspd3yD65VohhpuuCOmLASjC" crossorigin="anonymous">
        <link href="https://cdn.jsdelivr.net/npm/select2@4.1.0-rc.0/dist/css/select2.min.css" rel="stylesheet" />
        <title>SMS Portal - Laravel 8 & Twilio</title>
    </head>
    <body class="bg-light">
        <div class="container mt-5">
            <h1 class="text-center">SMS Portal - Laravel 8 & Twilio</h1>
            <div class="row p-4 border rounded-3 bg-body">
                <div class="col-6">
                    <div class="card">
                        <div class="card-header">
                            Add Phone Number
                        </div>
                        <div class="card-body">
                            <form action="/" method="POST">
                                @csrf
                                <div class="form-group">
                                    <label>Enter Phone Number</label>
                                    <input type="tel" class="form-control" name="phone" placeholder="+6282xxxxxxx">
                                </div>
                                <button type="submit" class="btn btn-primary mt-2">Add Contact</button>
                            </form>
                        </div>
                    </div>
                </div>
                <div class="col-6">
                    <div class="card">
                        <div class="card-header">
                            Send SMS
                        </div>
                        <div class="card-body">
                            <form method="POST" action="/custom">
                                @csrf
                                <div class="form-group">
                                    <label>Select contact</label>
                                    <select name="contact[]" multiple class="form-control contact">
                                        @foreach ($users as $user)
                                        <option>{{$user->phone}}</option>
                                        @endforeach
                                    </select>
                                </div>
                                <div class="form-group">
                                    <label>Message</label>
                                    <textarea name="body" class="form-control" rows="3"></textarea>
                                </div>
                                <button type="submit" class="btn btn-primary mt-2">Send</button>
                            </form>
                        </div>
                    </div>
                </div>
            </div>
        </div>
        <script src="https://code.jquery.com/jquery-3.6.0.min.js" integrity="sha256-/xUj+3OJU5yExlq6GSYGSHk7tPXikynS7ogEvDej/m4=" crossorigin="anonymous"></script>
        <script src="https://cdn.jsdelivr.net/npm/select2@4.1.0-rc.0/dist/js/select2.min.js"></script>
        <script>
            $(document).ready(function() {
            $('.contact').select2();
            });
        </script>
    </body>
</html>
Then we need to adjust the welcome.blade.php file so that it can display the input form that we will use to create the additional contact data feature and the SMS broadcast feature. For that, please copy all the code above and replace it in the welcome.blade.php file.
In this welcome.blade.php file, we will use bootstrap version 5.2 to make the interface more pleasing to the eye. And for multiple select we use select2 library. Because we use select2, so we also need to use jquery.
Testing Broadcast SMS with Laravel 8

After going through the processes starting from registering a Twilio account and getting Twilio credentials, installing laravel, installing the Twilio SDK package and others, now is the time to test. Please run the server with the command php artisan serve, then open it in a browser with the URL 127.0.0.1:8000 or sms-portal-laravel-Twilio.test (if using valet). The root view or the first project page that appears will be like the image above. There are two cards, each of which has a different feature function, namely to add contact data and broadcast or send SMS with custom messages.
Test Add Contact Data
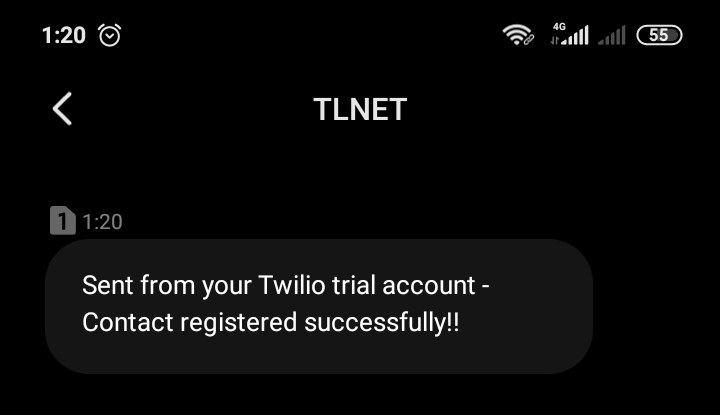
The first test we will test the added contact data feature. Please enter the telephone number with the country code (such as +62) and click Add Contact, the contact data will be successfully added to the contacts table and the system will send an SMS message to the telephone number in the form of text as in the example image above. The message text is the text that we defined in the store method in the HomeController.php file.
SMS Broadcast Test
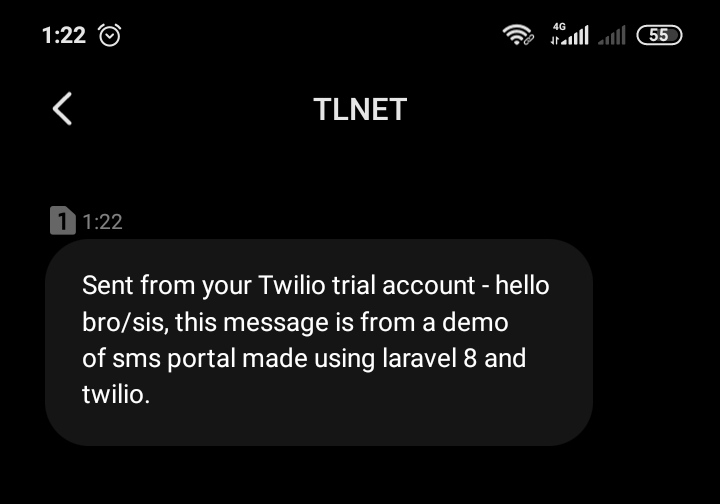
After testing the added contact data feature and successfully sending SMS notifications, now we are testing the SMS broadcast feature. On the card with the "Send SMS" header card, please select which contacts will receive the SMS broadcast message, then try typing any text in the textarea and click Send. Then the system using the programmable messaging API service from Twilio will send SMS messages with text according to what has been inputted. An example of an SMS broadcast message can be seen as in the example image above.
Conclusion
In this tutorial, we have both learned how to create a simple SMS broadcast system or SMS portal with laravel 8 and the programmable messaging API service from Twilio. At the end of the tutorial, we have also tried the added contact data feature which will send notifications or SMS messages to the contact numbers that have been added and have also tried the SMS broadcast feature which will send SMS messages according to what has been inputted to many telephone numbers (contacts). .
That's all for this article, if there are criticisms, suggestions, or whatever you want to discuss, please write your comments in the comment form provided below. See you
Doc: Twilio SMS
- Cara Mengatasi Error XAMPP: MySQL shutdown unexpectedly 23 Oktober 2021 68170 views
- Tutorial CRUD (Create, Read, Update & Delete) Codeigniter 4 dengan Bootstrap 14 Oktober 2021 33623 views
- Laravel 8: REST API Authentication dengan Sanctum 17 September 2021 32640 views
- Membuat REST API CRUD di Laravel 8 dengan Sanctum 18 September 2021 28828 views
- Contoh Cara Menggunakan Sweet Alert di Laravel 8 27 Agustus 2021 28195 views